Have you ever dreamt of giving your car a fresh, new look without straining your wallet? You’re not alone! The trend of personalizing car appearances is booming among car enthusiasts and DIYers worldwide. And if you’re looking to jump on this trend, SANVO Car Spray Paint offers an excellent DIY solution. With the right tools and a bit of patience, you can transform your vehicle into a head-turner.
This guide will walk you through everything you need to know to repaint your car using SANVO spray paint, from preparation to the final touch-up.

Your Essential Preparation List for DIY Car Aerosol Spray Painting
Before embarking on your car painting adventure, you’ll need to gather some essential supplies. Proper preparation is crucial for achieving the best results and ensuring your safety throughout the process. Here’s what you’ll need:
- SANVO Acrylic Spray Paint
Choose your desired color and finish. SANVO offers a variety of options, so be sure to select the one that best suits your style and needs.
- Respirator or Mask
Protect yourself from inhaling fumes by wearing a quality respirator or at least a mask. This is a vital step in safeguarding your health during the painting process.
- Safety Goggles
Eye protection is essential when working with aerosol spray paint. Safety goggles will shield your eyes from overspray and any potential irritants.
- Gloves
Keep your hands clean and protected with a pair of gloves. This will also help prevent oils and dirt from contaminating the car’s surface during the painting process.
Having these supplies on hand will streamline your project and enhance your overall experience. With the right preparation, you’re well on your way to achieving a showroom-worthy finish.
Step-by-Step Guide to DIY Car Spray Painting
Follow these detailed steps to ensure a flawless finish with SANVO Car Spray Paint:
Cleaning the Car Thoroughly
A clean surface is key to a smooth paint job. Start by washing your car with soap and water to remove dirt, grease, and grime. Pay special attention to crevices and areas that are prone to buildup. A clean canvas will help the paint adhere better and result in a more even application.
After washing, dry the car completely with a microfiber cloth to avoid water spots. Once dry, consider using a degreaser or alcohol-based cleaner to eliminate any remaining residues. This extra step ensures that no contaminants interfere with the paint’s adhesion.
Setting Up the Painting Area
Choose a well-ventilated area for your painting project, ideally outdoors or in a garage with good airflow. Lay down drop cloths or plastic sheeting to protect the ground and surrounding objects from overspray. Secure the sheeting with tape to prevent it from shifting during the painting process.
Good lighting is also important for identifying any imperfections and ensuring even coverage. Arrange LED work lights or position your car to take advantage of natural light. This setup will help you achieve a professional-looking finish.
Sanding the Car Surface
Sanding the car’s surface is an essential step to ensure the new paint adheres properly. Using 400-grit sandpaper, gently sand the entire area you plan to paint. The goal is to create a smooth, matte surface that allows the primer and paint to bond effectively.
Work in small sections and apply consistent pressure to avoid uneven sanding. After completing this step, wipe away any dust with a tack cloth. This ensures a clean surface for the primer application.
Masking Off Protective Areas of the Car
Before applying paint, mask off areas you don’t want to spray, such as windows, trim, and emblems. Use painter’s tape and masking paper to cover these parts securely. Take your time with this step to ensure crisp, clean lines and prevent accidental overspray.
Double-check your masking job for any gaps or loose edges. Proper masking is critical for achieving a professional appearance and avoiding unwanted paint in sensitive areas.
Apply the Primer
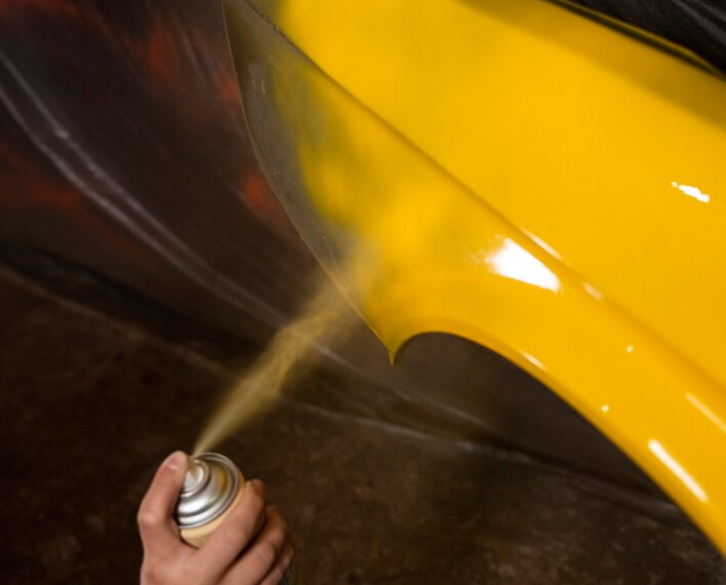
With the surface prepped and masked, it’s time to apply the primer. Shake the can of SANVO primer thoroughly and begin spraying in smooth, even strokes. Maintain a consistent distance from the surface and move the can steadily to prevent drips and runs. Hold the can approximately 8-12 inches from the surface. Begin at the top and work your way down, overlapping each pass slightly to ensure full coverage.
Allow the primer to dry as per the manufacturer’s instructions, usually around 15-30 minutes. If needed, apply a second coat for added coverage and durability. Once the primer is dry, lightly sand it with 800-grit sandpaper and wipe the surface clean. This method reduces the risk of imperfections and ensures a durable foundation for your paint.
Apply the Base Coat
Once the primer is fully dry, you’re ready to apply the SANVO acrylic spray paint base coat. Follow the same technique used for the primer, starting with light, even coats. Hold the can at a consistent distance and keep a steady hand to achieve a uniform finish.
Apply 2-3 coats of base paint, allowing adequate drying time between each coat. Be patient during this step to avoid rushing and compromising the quality of your paint job.

Apply the Clear Coat
The clear coat adds gloss and protection to your paint job. After the base coat has dried completely, apply the clear coat using the same method. This layer will help protect your paint from UV rays, chips, and environmental factors.
Apply 2-3 layers of clear coat, allowing each one to dry thoroughly before proceeding. The result should be a glossy, professional finish that enhances your car’s appearance.
Wet Sanding, Buffing, and Polishing
For the ultimate shine, wet sanding, buffing, and polishing are essential. Begin by wet sanding the clear coat with 2500-grit sandpaper to remove any minor imperfections. Use plenty of water to keep the surface lubricated and avoid scratches.
After wet sanding, buff the surface with a rubbing compound to restore the gloss. Finish with a high-quality polish to achieve a mirror-like shine. These steps will elevate your paint job from good to great.
Final Inspection and Touch-Ups
Once the paint has dried and cured, inspect your work for any imperfections or missed spots. Use a fine brush or a small amount of spray paint to touch up any areas that need attention. A meticulous inspection ensures a flawless, professional finish.
Remove the masking tape and paper carefully to reveal your freshly painted car. Take a moment to admire your handiwork and celebrate a job well done!
Expert Tips for Car Spray Painting Success
Now that you’ve mastered the basics, here are some additional tips to take your DIY car painting project to the next level:
How to Remove Spray Paint from Car
Accidents happen, and sometimes spray paint can end up where it shouldn’t. To remove unwanted paint, use a scraper. For stubborn spots, a little patience and a commercial paint remover can go a long way. Apply the product gently to avoid damaging the underlying factory finish. If you’re unsure, consult a professional for guidance.
How Long Does It Take Spray Paint to Dry
Drying times can vary depending on factors like temperature and humidity. Generally, SANVO spray paint takes about 30 minutes to dry to the touch and 24 hours for a full cure. Always refer to the product instructions for specific drying times.
To speed up the process, consider using a heat lamp or moving the car to a warmer area. Proper drying is essential for achieving a long-lasting finish.
Or, the most convenient way is to choose fast-dry acrylic car spray paint from reliable suppliers like SANVO.

The Benefits of Using SANVO Acrylic Spray Paint
Choosing the right paint is crucial for a successful DIY project. SANVO acrylic spray paint offers several advantages that make it an excellent choice for car enthusiasts and DIYers:
- Versatility: Suitable for a wide range of surfaces, SANVO spray paint can be used on metal, plastic, and more. Its versatility makes it a go-to option for various projects.
- Durability: SANVO paint is designed to withstand the elements, ensuring a long-lasting finish that resists fading and chipping.
- Ease of Use: With its user-friendly spray nozzle and quick-drying formula, SANVO makes painting accessible for DIYers of all skill levels.
Craft Your Dream Car with DIY SANVO Car Spray Paint
Transforming your car’s appearance doesn’t have to be a daunting task. With SANVO Car Spray Paint, you can achieve a professional finish from the comfort of your garage. By following the steps outlined in this guide, you’ll gain the confidence and skills needed to tackle any auto detailing project.
Whether you’re looking to revitalize an old ride or customize a new one, SANVO provides the tools you need to make your vision a reality. Remember, practice makes perfect. Don’t hesitate to experiment and refine your technique with each project.
Ready to get started? Gather your supplies, prepare your workspace, and unlock the potential of your car with SANVO Car Spray Paint. Join the community of DIY car enthusiasts and share your success stories and tips with fellow auto detailing aficionados. Your perfect paint job is just a spray away!
